Plumbing made simple: Wrenches, snakes, and unexpected quality control.

If you’re a homeowner, eventually you’re going to face a plumbing project—whether it’s fixing a leaky faucet, unclogging a drain, or installing a new fixture. The good news? You don’t need a truck full of tools to get the job done. With a few key basics, you can tackle most small plumbing repairs yourself—and maybe even impress the most discerning supervisor: a curious black cat inspecting your work. From wrenches to drain snakes, this beginner’s guide will show you how to get the job done efficiently… while keeping a sense of humor handy.
Let’s break down the must-have plumbing tools for beginners, how to use them, and where you can snag a good one online.
DIY tip #47: Always secure your tools… unless you want feline quality control.
1. Adjustable Wrench
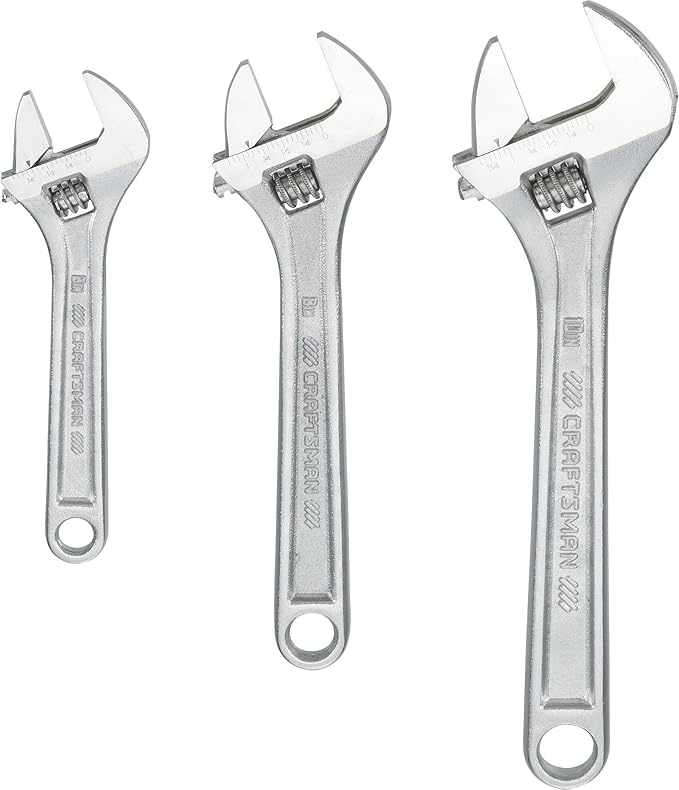
What it’s for: Tightening and loosening nuts and fittings on faucets, supply lines, and compression nuts.
How to use it:
- Open the jaws to fit snugly around the nut.
- Turn slowly and firmly—don’t over-crank or you’ll strip the fitting.
- Pro tip: Use two wrenches (one to hold the pipe steady, one to turn) when loosening tough connections.
Here’s a fun tidbit: the adjustable wrench was invented by a Swedish engineer named Johan Petter Johansson in 1891, but it wasn’t originally called an “adjustable wrench.” He actually patented it as a “swivel wrench” because the jaw could move to fit different sized nuts and bolts.
Even cooler: in the early days, people would sometimes carry just one adjustable wrench instead of a whole set of fixed wrenches—a true “one tool to rule them all” moment in hardware history.
Some people use an adjustable wrench as an emergency hammer or even a makeshift clamp when a proper tool isn’t around. Not exactly textbook-approved, but it shows just how versatile—and desperate—DIYers can get.
Basically, it’s the Swiss Army knife of the wrench world… just a bit heavier and harder on your knuckles.
We earn a commission if you make a purchase, at no additional cost to you.
2. Pipe Wrench
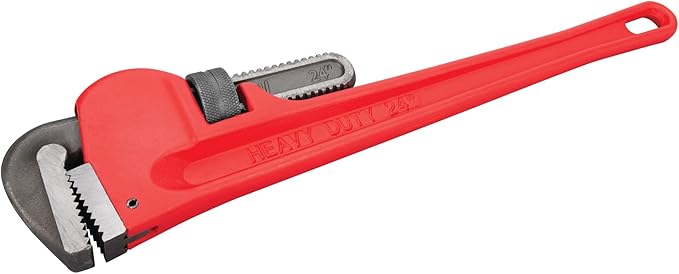
What it’s for: The muscle tool for gripping and turning iron pipes and stubborn fittings.
How to use it:
- Place the wrench with the serrated teeth gripping the pipe.
- Always pull, never push—the teeth bite in better and you’re less likely to slip.
- Use a rag on finished surfaces to prevent scratching.
Some fun facts:
We earn a commission if you make a purchase, at no additional cost to you.
3. Basin Wrench

What it’s for: Reaching the awkward nuts that hold faucets to the sink—usually in places your hands can’t fit.
How to use it:
- Position the claw around the nut at the back of the sink.
- Twist the T-handle—its long shaft lets you reach tight spaces.
- Take your time; this is a patience tool.
Interesting Facts About the Basin Wrench
- Designed for the Impossible Angles
The basin wrench was invented specifically to reach nuts behind sinks—places your hands simply can’t go. Think of it as the plumbing tool that defies geometry… unlike your cat, who somehow always finds a way to sit on top of the sink anyway. - Telescoping Handles Aren’t Just Fancy
Modern basin wrenches often have telescoping handles that let you extend for extra reach. This feature is perfect for tight spaces where a standard wrench just won’t fit, giving you the leverage you need without contorting your arms. - Spring-Loaded Jaws Make Life Easier
The jaws automatically grip the nut when you push or pull, which is especially helpful in tight, hard-to-see spaces where precision is key. - It’s Surprisingly Versatile
Beyond faucets, basin wrenches can tackle awkward valves and fittings under sinks. Its design allows you to work in confined spaces that other wrenches simply can’t reach. - A Must-Have for Every DIYer
While a standard wrench can handle many jobs, nothing beats a basin wrench for back-of-the-sink challenges. And if your cat insists on supervising, at least you’ll have a tool that fits in even the trickiest spots—so there’s no reason to share your workspace.
We earn a commission if you make a purchase, at no additional cost to you.
4. Plumber’s Tape (Teflon Tape)
What it’s for: Sealing threaded pipe joints to prevent leaks.
How to use it:
- Wrap the tape clockwise around the threads 3–4 times.
- Make sure it lies flat and smooth—wrinkles can cause leaks.
- Screw the fitting in place as usual.
👉 Stock up on plumber’s tape here
5. Plunger
What it’s for: The first line of defense against clogged sinks, toilets, and tubs.
How to use it:
- Make sure there’s enough water to cover the plunger’s rubber cup.
- Create a seal and plunge with a firm up-and-down motion.
- For toilets, use a flange plunger (the one with the extra flap).
👉 This heavy-duty plunger is worth having in every home
6. Tongue-and-Groove Pliers (Channel Locks)
What it’s for: Gripping, twisting, and holding pipes, fittings, and nuts of all shapes and sizes.
How to use it:
- Adjust the jaw size with the sliding groove.
- Use one set of pliers to stabilize and the other to twist for extra leverage.
- Keep a rag handy to protect chrome finishes.
👉 These popular channel locks are a great starter set
7. Hacksaw
What it’s for: Cutting through metal or plastic pipes, nuts, bolts, and screws.
How to use it:
- Clamp the pipe or fitting to keep it steady.
- Use slow, even strokes—let the saw teeth do the work.
- Swap blades when cutting plastic vs. metal.
👉 See a dependable hacksaw option here
8. Plumber’s Putty
What it’s for: Sealing sink drains and fixtures where waterproofing is needed.
How to use it:
- Roll a rope of putty between your palms.
- Press it around the underside of the fixture (like a sink drain).
- Tighten into place and wipe away excess.
👉 Pick up a tub of plumber’s putty
9. Drain Snake (Hand Auger)
What it’s for: Clearing clogs that plungers can’t handle.
How to use it:
- Insert the coil into the drain and turn the handle to push it through the clog.
- When you feel resistance, crank and push until the blockage clears.
- Pull the snake out carefully—yes, it’s going to be gross.
👉 Try this budget-friendly hand auger
10. Bucket & Towels
What it’s for: Catching water and preventing “Oh no, the floor is flooding” moments.
How to use it:
- Place the bucket under pipes before disconnecting anything.
- Towels catch the sneaky drips that escape.
👉 Grab an affordable bucket set
Final Thoughts
Plumbing doesn’t have to be scary—most small jobs just require the right tool, a little patience, and maybe a willingness to get your hands wet. Stock up on these beginner-friendly tools, and you’ll be prepared for most plumbing projects that come your way.
FAQ
Q: Do I need to buy all these tools at once?
A: Nope. Start with the essentials like a plunger, adjustable wrench, and plumber’s tape. Add more as projects come up.
Q: Can I use regular tape instead of plumber’s tape?
A: Duct tape is awesome—but not here. Plumber’s tape is designed to seal pipe threads properly.
Q: Are drain cleaners safe instead of a snake?
A: Chemical drain cleaners can damage pipes (and your lungs). A snake is safer, reusable, and way more effective.