
(And How an Old Barn and Some Free Wood Chips Made Mine Even Better)
There’s something incredibly satisfying about building a raised garden bed — especially when you do it using reclaimed materials, a little sweat, and a touch of creative problem-solving.
When I built my first raised beds, I didn’t run to the lumber yard. Instead, I helped a friend tear down an old barn he wanted gone. Those weathered timbers? They became the backbone of my garden. Add in some free wood chips from a local gravel yard for the walking paths, and my little backyard plot turned into a full-on homesteading project.
Whether you’re going the recycled route like I did, or buying fresh-cut cedar, here’s how to build a raised bed that’s sturdy, productive, and built to last.
🧰 What You’ll Need (Materials + Tools)
Materials:
- Recycled or untreated lumber (2x10s or 2x12s)
- Exterior deck screws (2.5″–3″)
- Landscape fabric or cardboard
- Organic soil + compost
- Wood chips or mulch for paths (optional but awesome)
♻️ Pro Tip: Look for old fencing, barn wood, or decking being torn out locally. Facebook Marketplace, Craigslist, or helpful friends can be gold mines.
Tools:
- Drill or impact driver
- Saw (hand, circular, or miter)
- Tape measure
- Carpenter’s square
- Level
- Staple gun (if using landscape fabric)
🌞 Step 1: Pick the Perfect Spot
- Choose a sunny, level spot with 6–8 hours of sunlight
- Avoid low-lying, soggy ground or big root zones
- Think about access — you want paths that are easy to walk and wide enough for a wheelbarrow
✂️ Step 2: Cut and Prep the Lumber
If you’re using reclaimed wood like I did, expect a few extra steps:
- Remove any nails, screws, or hardware
- Check for rot (solid is good, flaky is firewood)
- Sand down rough edges if needed
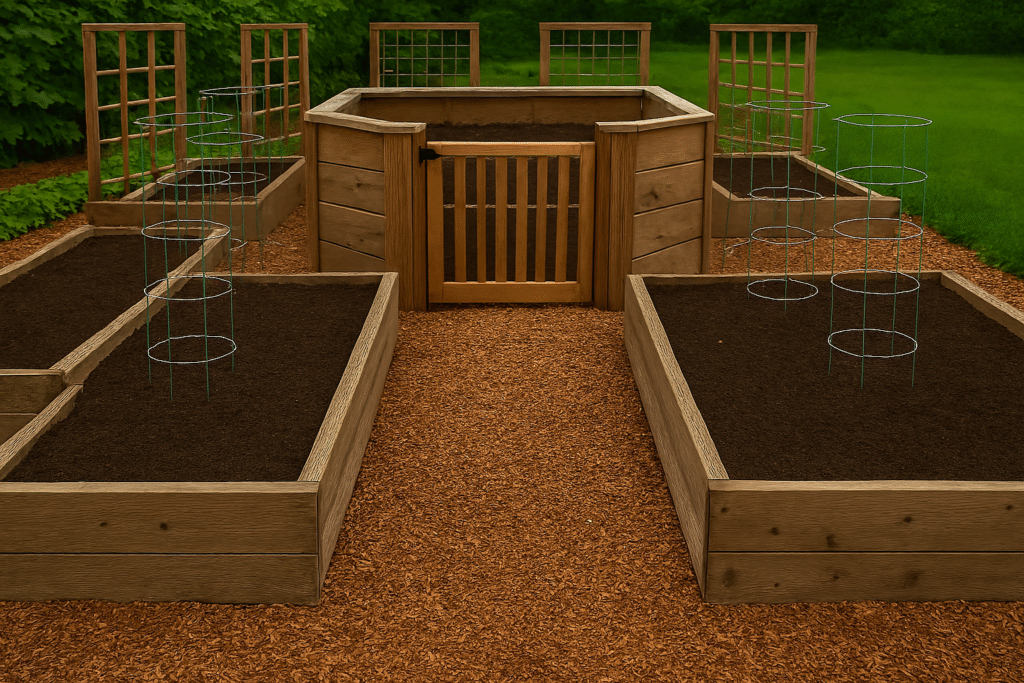
Standard size: 4′ x 8′ — great for reach and layout
- Cut one board in half for the 4′ sides
- Leave two full 8′ boards for the long edges
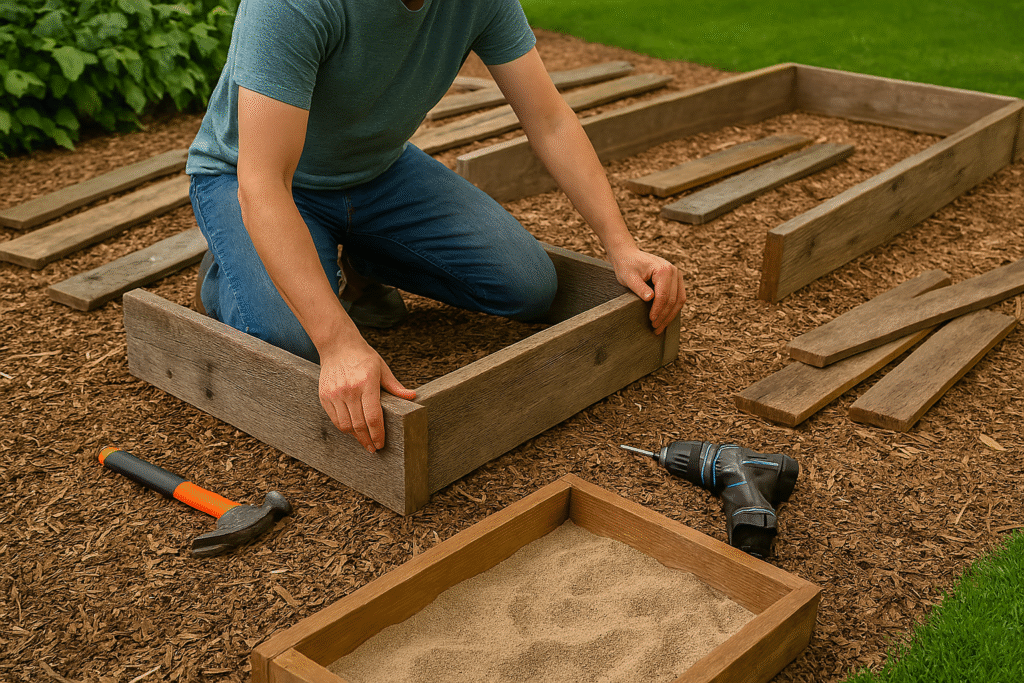
🔧 Step 3: Assemble the Frame
- Lay boards out in a rectangle
- Use your carpenter’s square to keep corners true
- Drill pilot holes and drive in your screws
- Add corner brackets or screw blocks inside corners for extra stability (especially if wood is older)
🛏️ Step 4: Prep the Bed Area
- Pull up sod or lay cardboard over grass
- Add landscape fabric if you’re worried about weeds
- Set the frame on top
Paths Tip: I spread wood chips from the local gravel yard between my beds. They keep weeds down, improve drainage, and smell pretty darn good after a rain.
🌱 Step 5: Fill the Bed
Use a 50/50 mix of compost and raised bed soil. You can buy a pre-blended mix or DIY it with:
- Local compost
- Peat moss or coco coir
- Vermiculite or perlite for drainage
🪴 I added worm castings and Espoma® Garden-Tone for a boost. Your tomatoes will thank you.
🧄 Step 6: Plant and Mulch
- Plant seeds or seedlings based on spacing recommendations
- Mulch around plants to retain moisture and keep weeds down
- Water deeply to settle everything in
🧹 Step 7: Maintain Like a Pro
- Add compost and mulch every season
- Water consistently — drip hoses save time
- Rotate crops to avoid pest build-up
- Invite beneficial insects by planting flowers like marigolds or nasturtiums nearby
🛒 Helpful Product Suggestions
- Raised Bed Soil Mix – Organic and ready to use
- Espoma Garden-Tone Fertilizer – Great for veggies
- Drip Hose System – Water smarter, not harder
- Landscape Staples & Fabric – Keep weeds where they belong (not in your lettuce)
🏁 Final Thoughts
Building a raised garden bed doesn’t have to cost a fortune or require a contractor’s license. With a little creativity (and maybe a friend who needs a barn torn down), you can create a productive, sustainable garden space you’ll be proud of.
Every time I walk down my wood chip path and see the plants thriving in those barnwood beds, I remember that sometimes the best things come from repurposed roots — literally.
Related Pages: