If you’ve ever watched rainwater rush down your gutters and thought, “Wow, I’m just letting free water slip away”—you’re right. Installing a rain barrel or cistern is one of the easiest, most cost-effective ways to collect and use nature’s bounty. Not only does it save you money on your water bill, but it also helps reduce stormwater runoff, which means less flooding, erosion, and pollution in your local waterways.
Whether you’re looking to water your vegetable garden, fill a chicken waterer, or be one step closer to off-grid living, here’s how to install a rainwater system that’s both functional and durable.
Choosing Between a Rain Barrel and a Cistern
- Rain Barrel – Typically 40–80 gallons, perfect for garden watering and small-scale needs. Easy to set up and often made from recycled food-grade barrels.
- Cistern – Can store hundreds to thousands of gallons. Ideal if you have more space, larger gardens, or want water available for household non-potable uses like toilet flushing or laundry (check local laws).
Step-by-Step: Installing Your Rain Barrel
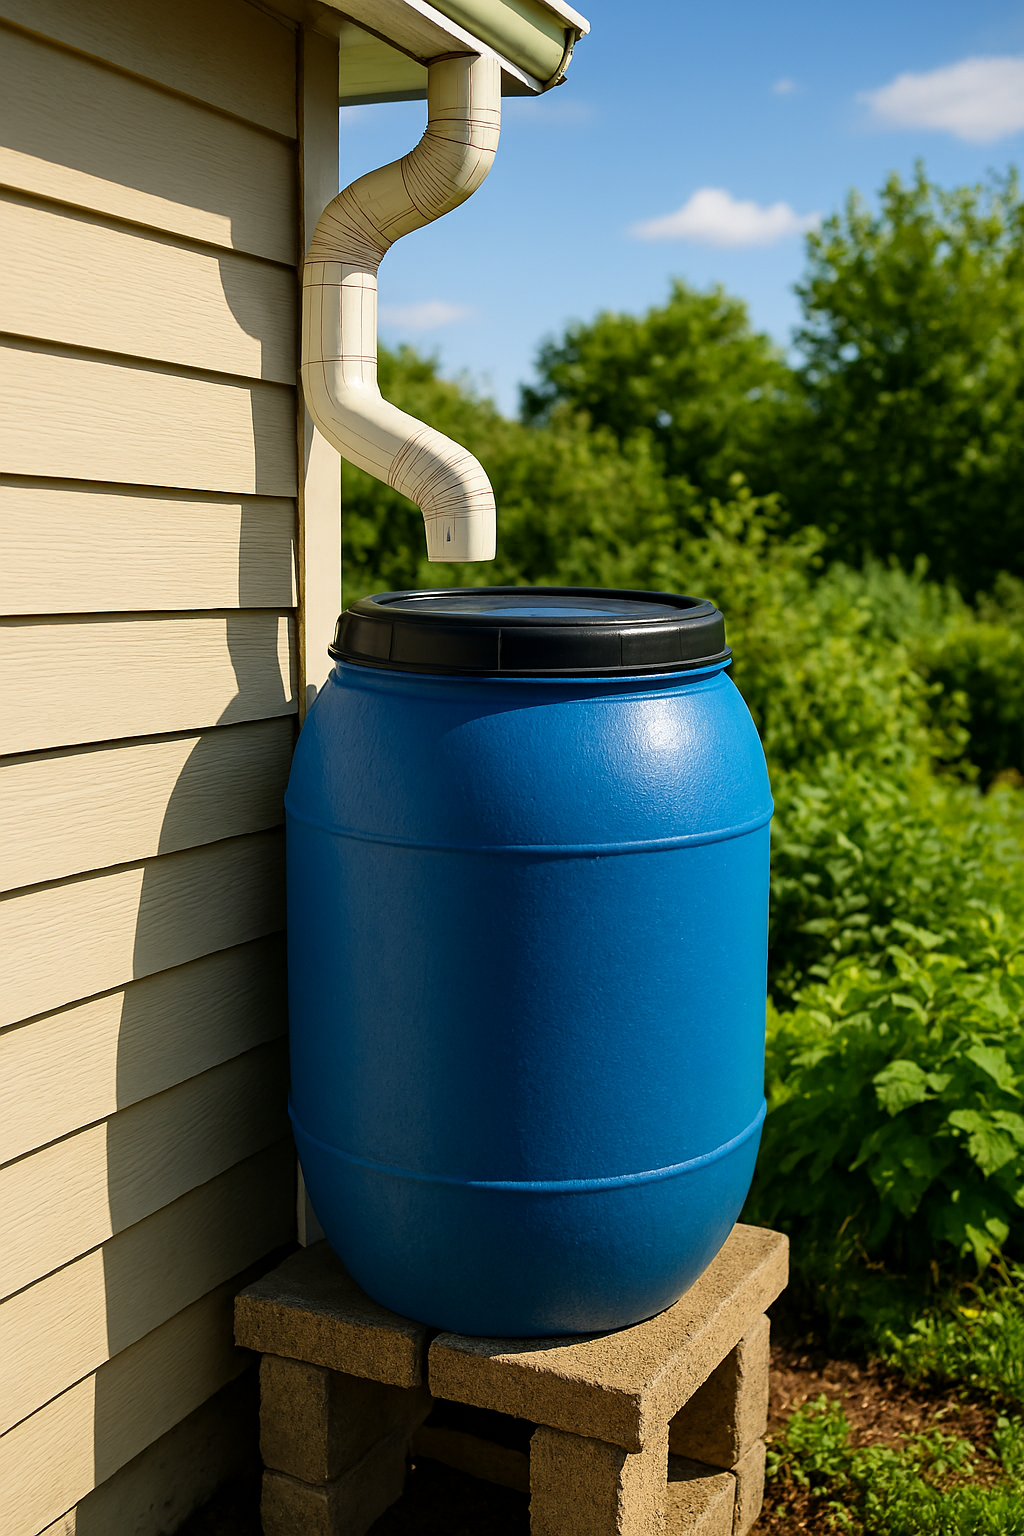
- Pick Your Location
Choose a spot under a downspout where rainwater flows most frequently. The closer to your garden or water-use area, the better. - Prepare the Base
Set your rain barrel on a sturdy, level platform made from cinder blocks, pavers, or a purpose-built stand. Raising it helps improve water pressure for gravity-fed hoses. - Install a Downspout Diverter
This directs water from your gutter into the barrel while preventing overflow from washing against your foundation. - Add a Filter Screen
A fine mesh screen keeps leaves, twigs, and adventurous mosquitoes out of your water supply. - Attach the Spigot
Install a brass or PVC spigot near the bottom for easy access. Consider adding a soaker hose or drip irrigation connection. - Plan for Overflow
Attach an overflow hose to direct excess water away from your foundation and into a drainage area or garden bed.
Installing a Cistern
- Foundation – Larger cisterns need a reinforced concrete pad or compacted gravel base to support their weight.
- Plumbing – A professional installation may be required if you’re connecting it to indoor fixtures.
- First Flush Diverter – Prevents the first, dirtiest runoff from entering your storage tank.
- Overflow Control – Always direct overflow to a safe drainage area or secondary storage.
Maintenance Tips
- Clean filters and screens every few weeks during the rainy season.
- Drain and rinse barrels once or twice a year to prevent algae buildup.
- Inspect for cracks, leaks, and clogged fittings.
- In freezing climates, empty or disconnect rain barrels before winter to avoid damage.
Pro Tips for Maximum Rain Harvesting
- Paint your barrel a dark color to prevent algae growth.
- Install multiple barrels in series for more storage.
- Use collected water within a week or two for freshness—unless you’re treating or filtering it.
- Keep the lid tightly secured to prevent mosquito breeding (and neighborhood “ewws”).
Why This Matters
By installing rain barrels or cisterns, you’re not just collecting water—you’re creating a more sustainable home, reducing your environmental impact, and safeguarding your garden during dry spells. Think of it as a savings account, but for water. And unlike the bank, nature doesn’t charge you interest.
Product Recommendations:
- Good Ideas Rain Wizard 50-Gallon Barrel – Affordable and great for beginners.
- Oatey Mystic Rainwater Diverter – Easy install for downspouts.
- Bushman 660-Gallon Slimline Cistern – For serious storage without taking over your backyard.

Leave a Reply