If you’re trying to get a perfect paint finish, having the right painting tools on hand can really make the difference. Whether you just want to give the living room a fresh color or you’re trying to tackle detail work as an artist, the proper paint tools decide how smooth, fast, and neat the results will be. Over the years, I’ve tried out all kinds of paint brushes, rollers, sprayers, palettes, and a bunch more. This guide is packed with my personal insights, favorite paint tools, and what pros and serious DIYers should know before picking up that next can of paint.
So, before jumping into the details of the best painting tools, here’s a quick snapshot of the most popular options, along with the key info you might need:

Product Name: Best Painting Tools 2024
Common Uses: Interior walls, trim, crafts, art, exterior paint jobs, detail work
Key Brands: Purdy, Wooster, Graco, Wagner, Winsor & Newton, Liquitex
Price Range: $2 up to $400+ (depending on tool type)
For Pros/DIY Artists: Both
Overall Top Tool: 9-Inch Premium Paint Roller Kit
Top Artist Tool: Professional Sable Paintbrush Set
Sprayers Featured: Yes
Trusted Stores: Home Depot, Lowe’s, and Ace Hardware
Free Painting Toolkit Download: YES.Start Here (no email required)
The real benefit of knowing your way around paint tools is that you get clean, pro-level results, waste less paint, and save much more time compared to the trial-and-error method. Whether you’re brand new to painting, coming at it from a DIY angle, or trying to step up your fine art, there’s something here for you. Beginner basics and expert gear both get covered step-by-step below.
So, to keep things easy and make sure you have every tool you need before you open a can or tube, I’ve broken things down by tool type, main uses, what makes each tool unique, and most importantly, how to choose the perfect paint tools for your next project.
About My Painting Toolkit Experience
I want to be transparent about my experience. I’m not just someone who writes about painting tools. I’ve painted everything from my entire house (walls, ceilings, and all those tight corners), repainted apartments, and spent weekends painting the interior of home for Habitat for Humanity. Over the years, I’ve wasted my share of paint and struggled with cheap tools, but every mistake taught me something new. That’s why I care a lot about helping people track down painting tools that actually help get the job done well.
If you ever have a question about which brush, roller, palette, mixer, or piece of gear is right for your job, feel free to reach out. There are lots of clever solutions and reliable products out there. Many are surprisingly affordable, too. Here’s some of the most helpful feedback I’ve received over time: “Thanks for making my paint job easier!”; “Your roller kit recommendation was spot on. No more streaks!”
This guide brings together what I’ve learned (and what the pros swear by) so you can skip the mistakes and get straight to the good stuff.
Core Painting Tools: From Walls to Fine Art

When it comes to painting, the best tool depends on what you’re painting, your budget, and honestly, how much you care about the final look. Professional painters and serious crafters will tell you it’s worth getting the right brush or roller for every stage of the project, while hobbyists might be able to get by with a simple set. Still, some tools are absolute game changers.
The tools below cover the main categories for general painting (walls, ceilings, trim), specialty projects (cabinets, furniture), and fine art (oil, watercolor, acrylics):
- Paint Brushes: Flat, angled, round, sash, detail, and specialty shapes
- Paint Rollers: Standard 9inch, mini, foam, microfiber, for smooth or textured walls
- Spray Guns and Power Sprayers: For fast, even coverage and large areas
- Palettes, Knives & Mixing Tools: Especially important for artists
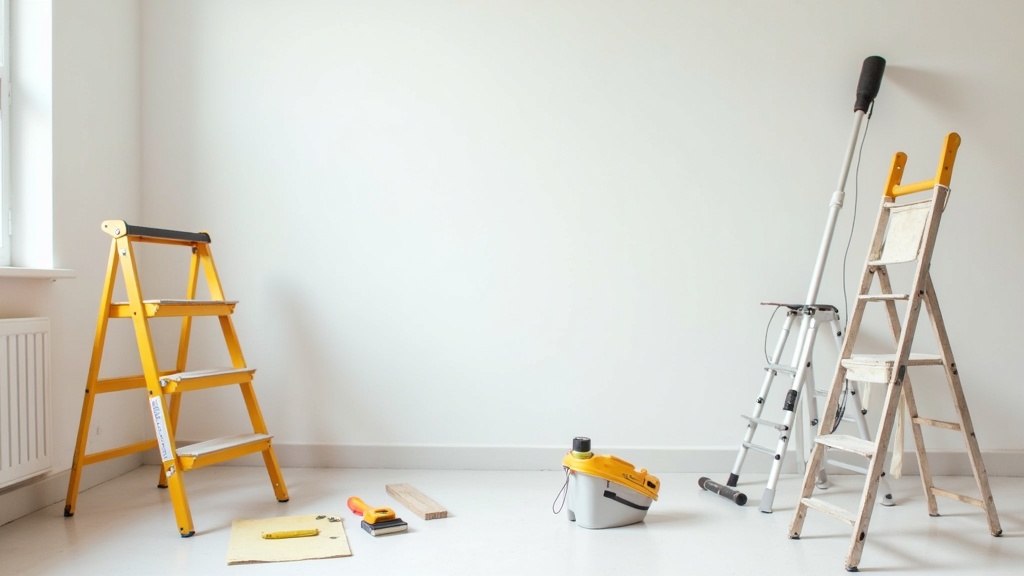
- Prep and CleanUp Tools: Drop cloths, painter’s tape, trays, buckets, rags, scrapers
Every tool here has a specific purpose, and skipping the right one pretty much guarantees headaches (ask me about the time I tried to paint a textured ceiling with a standard roller. It was a big mistake!). Here’s a breakdown of what each main tool does, what to look for, and my picks for the best from years of personal experience:
Paint Brushes: Shapes, Sizes, and Advice
Brushes are still the most universal and flexible painting tool of all time. Whether you’re cutting in along the edges of a wall, brushing on detail for a mural, or working with oils for a portrait, paint brushes come in more variations than you’d expect.
- Flat Brushes: Great for covering medium and large surfaces, ideal for corners and for spreading paint evenly.
- Angled or Sash Brushes: Super useful for edging and cutting into trim without taping everything first.
- Round and Detail Brushes: Used by artists for fine lines and detail, not for house painting but a must for art and crafts.
- Foam Brushes: I keep these around for touch-ups, stain application, and tiny spaces where regular bristles won’t fit.
When I started painting, I thought all brushes were about equal, just grab what’s on sale. How wrong I was! The best brushes use high quality synthetic bristles (for latex paints) or natural bristles (for oil-based paints). A solid handle and well-made ferrule (the metal band holding the bristles) are worth paying for, since cheap ones lose their shape and shed bristles everywhere.
I always keep a set of Purdy XL brushes around. These handle latex and oil paints, are easy to clean, don’t lose bristles, and have comfortable handles. If you’re looking for an artist’s set, Winsor & Newton and Princeton make excellent options for just about any paint type. Try to match brush size to your job: 2inch angled for cutting in, 2.5inch for trim, 3inch flat for wide boards or walls.
Popular Painting Brushes:
- Purdy XL Sprig 2inch Angled Sash
- Wooster Shortcut Angle Sash Brush
- Winsor & Newton Series 7 Kolinsky Sable Watercolor Brushes
- Da Vinci Maestro Oil Brushes
- Duralon (Synthetic) Flat and Filbert Sets for Acrylic
Paint Rollers: When And Why to Use Them
Rollers make big, flat surfaces much faster and smoother than any brush. They’re my go to tool for walls, ceilings, larger trim, and even for priming furniture. Picking the right roller means less work and a better outcome, so here’s what I keep in my kit:
- 9Inch Standard Rollers: Best for most walls and ceilings. Always go for a sturdy frame. The cheap handles bend quickly if you press too hard.
- Mini Rollers: I like these for doors, cabinets, or getting between obstacles. Super handy for tight spaces.
- Foam Rollers: Excellent for ultrasmooth surfaces and for applying finishes and varnishes to furniture or cabinetry.
The important variable is the “nap” or thickness of the roller cover. Here’s what I use as a rule of thumb:
- 1/4inch nap for smooth surfaces (best for trim or finely finished walls)
- 3/8 to 1/2inch for lightly textured walls or ordinary drywall
- 3/4inch nap (or even bigger) for brick, masonry, rough ceiling texture
My favorite roller kits come from Wooster and Purdy, but I’ve had good luck with some of the newer microfiber brands too. If you don’t want to splurge or just need a roller for one job, go to your local hardware store and feel the covers for density and thickness. If they feel cheap, they probably won’t hold paint or release it evenly.
Recommended Paint Rollers:
- Purdy White Dove 9inch Roller Kit (smoothest finish, lasts for years)
- Wooster Pro MiniKoter 4inch Mini Roller (cabinets and hard to reach spots)
- FoamPRO Fine Finish 2inch Foam Roller
Paint Sprayers and Spray Guns: The Fast Lane
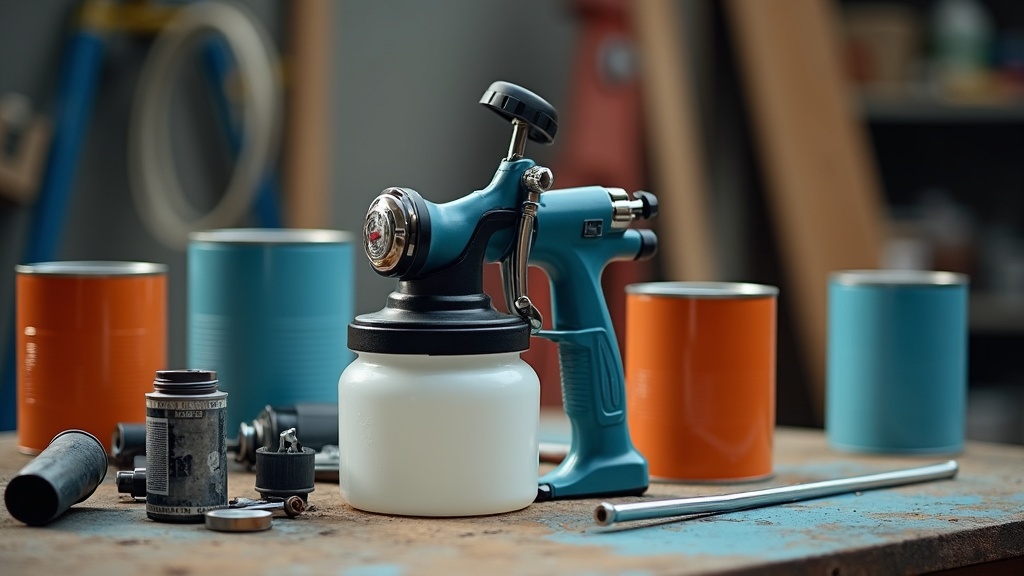
If you’re doing a big project (like that old fence, siding, or painting panel doors), paint sprayers really do save loads of time and deliver a perfectly smooth coat. There are two main types:
- Airless Sprayers: Super fast, great for exteriors, fences, and very large rooms.
- HVLP (High Volume Low Pressure): Perfect for furniture, cabinets, doors, and artsy finishes. These give you more control and produce fewer paint clouds (less overspray).
If you go this route, be aware that sprayers have a learning curve. I recommend Graco for airless and Wagner for HVLP models. Setup and cleaning will take extra time, but nothing else can compete when you need to cover a large area fast or want to spray specialty finishes (like metallics and lacquers).
You also want to mask and cover everything with plastic sheeting, and wear a good mask. And yes, you do need to thin most paints and clean clogs fast, so read the manual!
Popular Models:
- Graco Magnum X5 Airless Sprayer (DIY favorite for bigger jobs)
- Wagner Control Pro 130 (a classic for furniture and cabinets)
- HomeRight Super Finish Max HVLP (budget option for crafters & smaller projects)
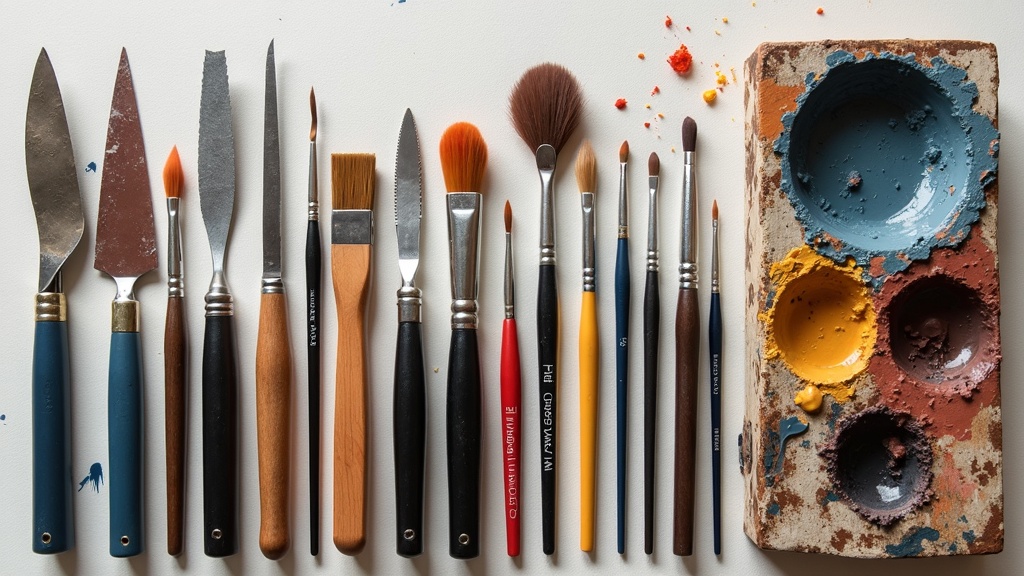
Artist Tools: Brushes, Palettes, and More
When I’m painting for fun or working on commissions, I rely on a few core artist’s tools that make a huge difference in the process. The right tools for artists are a bit different from room painting gear. You’re looking for precision, flexibility, and media specific options.
- Detail and Technique Brushes: Tiny pointed rounds for lines, filberts for blending, fans for texture. Artists collect these in sets for good reason.
- Mixing Palettes: From basic plastic palettes to glass versions for pros, mixing is a major part of painting. For acrylic and watercolor, a simple white palette with wells is perfect. For oils, a wooden or glass palette gives you a bigger space for color.
- Palette Knives: Not just for mixing, these are used for applying thick paint, creating texture effects, or scraping off mistakes. A set with different shapes (diamond, trowel, etc.) is super useful.
Don’t forget cleaning gear. Jars for water/solvent, rags, and a brush holder keep things organized and extend the life of your nice brushes. If you’re a beginner, just start with a basic synthetic set to get the feel for shapes, then slowly add quality natural brushes for the paints you use most.
Trusted Artist Tool Brands:
- Winsor & Newton Artist Brushes
- Princeton Select Brush Sets
- Liquitex and Blick Palettes and Knives
- Masterson StaWet Palette (great for acrylics)
- Jack Richeson Grey Matters Glass Palette
Prep Tools: Mask, Tape, and CleanUp (Don’t Skip These!)
Most DIY painters learn the hard way that half the time spent painting is actually spent taping, masking, cleaning, and prepping. Skipping prep equals more cleanup or messy results every time. Here’s my non negotiable kit for prepping any painting job:
- Painters Tape: Blue or green tape is worth every penny for crisp lines. FrogTape is a favorite.
- Drop Cloths: Go for reusable canvas cloths for most indoor jobs; plastic sheets for heavy splatter or spray work.
- Paint Trays and Liners: Tray liners make cleanup fast. For artists, I prefer a handheld palette or mixing tray.
- Stir Sticks, Pour Spouts, and Funnels: Stir the paint every time if you want even color. Pour spouts minimize mess on the can rim.
- Scrapers and Sandpaper: For smoothing rough surfaces, removing old paint, or prepping wood and drywall. Always have a couple of grits handy.
For larger projects or rooms (think ceiling painting), consider an adjustable telescoping pole for your roller. Paint grids, used instead of trays, can clip into a bucket and save tons of back and forth when working with big amounts.
What Supplies Do Professional Painters Use?
Professional painters never come to a job with just a brush and a drop cloth. Over time, they’ve found which products save time, give cleaner results, and make tricky jobs easier. Watching pros work is eye opening, and I’ve borrowed a lot of their secrets for my home jobs.
- HighQuality Brushes and Rollers: Purdy, Wooster, and Corona are the brands you’ll see in nearly every pro’s kit.
- Extending Poles: Telescoping poles for ceilings, stairwells, and high walls eliminate the need for ladders.
- Caulking Tools: Pros touch up gaps, cracks, or small nail holes with a caulk gun and finishing tools before painting.
- Multipurpose Knives and Scrapers: Everything from opening paint cans to patching holes and scraping loose paint.
- Clean Buckets and Paint Grids: For rolling out of a 5gallon bucket without constant tray refills.
- Respirators and Eye Protection: Especially important for spraying or working with solventbased paints.
Some pros also use disposable coveralls, knee pads, and padded handles to make long days a little easier. And seriously, ask a pro how often they clean their brushes or replace roller covers. It’s way more frequent than most DIYers expect. Clean tools last longer and keep giving great results job after job.
Picking the Best Tool For Your Paint Job
A common question is, “What is the best tool to paint with?” Here’s how I see it:
- For big walls or ceilings: Use a quality 9inch roller with the correct nap.
- For trim and corners: A 2inch angled sash brush gets you clean lines. Sometimes you can skip tape entirely.
- For doors and cabinets: Mini rollers or a fine brush, sometimes foam for a mirrorsmooth look.
- For mural or decorative art: Start with a small round or liner brush, upgrade as needed for blending and texture.
- For furniture and crafts: Foam brushes and HVLP sprayers give beautiful finishes.
Key tip: If you’re painting over glossy surfaces or stains, make sure you have a decent sanding sponge and an appropriate primer in your kit. It cuts down on the number of coats and helps the new paint stick. I always keep a small can of waterbased primer for quick fixes.
Extra Gadgets and Tools To Consider
Some tools aren’t essential but can make painting a lot easier, especially if you paint often or want to save time. I’ve added a few that I personally love to use:
- Edge Painting Tools: These handy gadgets keep edges crisp without needing to tape everywhere. They have a pad and guide that let you run right along trim and corners.
- Paint Can Pour Lids: These lids snap onto the rim of your paint can, making it way easier to pour (with less mess) and reseal for storage.
- Brush and Roller Cleaning Tools: A spinning tool or paintbrush comb gets the paint out of bristles fast and prolongs their life. Worth the $5 to $10 investment.
- TouchUp Pens: These are refillable pens for sneaky wall nicks or scuffs. Great for last minute fixes before company arrives.
- Magnetic Brush Holder: Clips onto paint cans or trays so your brush isn’t always falling in.
You don’t need every gadget, but if you find your back hurting from bending or getting streaky lines despite your best efforts, one of these solutions will help you out.
Quick List: Essential Supplies for All Painters
Whether you’re just starting out, doing a one off project, or want to upgrade your home toolkit, this basic list covers what I find most useful:
- Angled sash brush, 2 inches (for trim and cutting in)
- Flat brush, 3 inches (for large flat surfaces)
- Mini roller and 9inch roller (with a few nap options)
- Painters tape (quality matters for sharp lines)
- Drop cloth (canvas is best, but plastic is cheap for messy jobs)
- Paint tray and liners (grab a few for easy swapping)
- Sandpaper or sanding sponge (medium and fine grades)
- Paint stick or mixer (for stirring thoroughly every time)
- Spackling paste and putty knife (for filling holes)
- Old rag or microfiber cloth (for dust or quick cleanups)
Trust me, having these on hand makes almost any painting project easier, from basic wall touchups to weekend craft projects or canvas artwork.
Choosing the Right Painting Tool (and Why It Matters)
People often ask why painters need so many different tools. The truth is, the surface you’re painting and the look you’re after make a huge difference in which tools work best. Here are a few scenarios that might help:
- Smooth Wall: Use a microfiber roller (3/8inch nap) for low texture and a flat nylon brush for corners.
- Textured Ceiling: Go thicker, 3/4inch nap roller, maybe even a pole extension if your neck hurts easily.
- Wood Trim: Synthetic angled sash brush is the go to for a smooth, streakfree finish.
- Metal or Furniture: Foam roller or HVLP sprayer gives the least brush marks and best finish.
- Art Canvas: Artist grade round, filbert, flat, and fan brushes (usually synthetic for acrylics, natural for oils or watercolor).
If you’re painting in hot or humid weather, you might need to thin your paint or use a special additive for smoother spreading. Always read the paint can, since new paint formulas come out every year!
What Tools Do Artists Use for Painting?
Artists usually have their own personal preferences, but after talking to lots of painters and creating artwork myself, here are the classic tools nearly every artist uses for different types of paint:
- Oil Painting: Natural hair bristle brushes (hog bristle), palette knives (for mixing/applying), wooden palette, linseed oil, and a sturdy easel.
- Acrylic Painting: Synthetic brushes (nylon or Taklon), plastic or glass palettes, palette knives or scrapers, misting bottle (keeps paint from drying).
- Watercolor Painting: Sable or squirrel hair round brushes (super soft and absorbent), palette with wells, watercolor paper, sponges, and water jars.
- Gouache/Tempera: Similar to watercolor, but thicker brushes can be used, and often with heavier paper or board.
- Mixed Media: A bit of everything: sponges, stencils, toothbrushes (fun for splatter effects), plus specialty applicators.
Over time, most artists develop their favorite shapes and brands. Good brushes might seem pricey, but they last far longer with care (and make for much easier work).
Common Accessories:
- Apron or smock (protects your clothes. Nobody enjoys cleaning paint out of jeans)
- Masking tape or artist tape (for creating clean borders)
- Brush washer and drying rack (really helps keep brushes in shape)
For a beginner, it’s better to pick a small, affordable set and slowly build your collection as you try new techniques and paints. Many major brands offer value packs that include a mix of shapes and sizes.
Painting Tools You Don’t Want to Be Without
Based on my own experience (and hearing a lot of DIY regrets), here are some tools worth splurging on and a few I always skip:
- Splurge On: Quality brushes (they really matter), proper roller frames (feel the handle before buying), FrogTape (nothing else gives as crisp a line), and a sturdy drop cloth (canvas lasts years).
- Budget Versions Work For: Paint trays and liners, touch up foam brushes, rags, and plastic sheeting if you don’t use it much.
- Specific NoGo’s: Super cheap multipacks of off brand brushes (the bristles fall out fast and leave streaks), rollers with cardboard cores (get squishy and bendy with any paint weight), and generic blue tape (doesn’t seal cleanly or always removes easily).
Where To Buy: Trusted Painting Supply Stores
- Home Depot (everything for home painting projects)
- Lowe’s (great for both DIY and pro brands)
- Ace Hardware (everything for home painting projects)
- Jerry’s Artarama (for serious artists and professionals)
- Amazon (convenient for last minute orders and reviews)
Many local hardware stores stock quality brushes and rollers. For artist tools and fine brushes, going with a dedicated art supply shop is the way to get the best advice and support. Plus, these stores often run “buy one, get one” deals on popular brushes or canvas.
Tips to Get the Most Out of Your Painting Tools
Even if you buy great tools, technique and care matter for how well they work and how long they last. Here are a few tips I always follow:
- Always clean brushes and rollers immediately after use (warm soapy water for latex, mineral spirits for oil based paints)
- Store brushes upright to keep bristles in shape
- Keep roller covers in a plastic bag if you’re taking a break. This keeps them moist between coats
- Don’t overload a brush or roller. It leads to drips and uneven coats
- Replace painter’s tape between coats for crisp, sharp lines
It’s tempting to buy cheap and toss your gear after each use, but investing in good tools pays off after just a couple of projects. Plus, you’ll spend much less time fixing streaks, splotches, or cleaning up after poor quality equipment.
Painting FAQs (What People Ask Most)
This wouldn’t be an all-in-one toolkit guide if I didn’t answer the questions everyone has asked me at some point. Here are quick, honest answers:
- What is the best tool to paint with? For walls, use a good roller kit; for trim and corners, a 2inch angled sash brush; for detail and fine art, professional art brushes fit for the type of paint you want to use.
- What supplies do professional painters use? High quality brushes and rollers, painter’s tape, drop cloths, extension poles, caulk gun, multi tool, buckets with grids, sanding sponges, and respirators for spray work.
- What do professional painters paint with? Top brands like Purdy, Wooster, Graco (for sprayers), plus contractor grade interior or exterior paint. They match brush, roller, or sprayer to the surface and the style they need to deliver for the job.
- What tools do artists use for painting? For art, professional grade brushes (matched to the paint), palettes, knives, and specialized surfaces (stretched canvas, high quality paper, or art boards). Additional accessories: easel, brush cleaning cup, palette knives, and usually some masking tape for clean lines.
Free Painting Toolkit Checklist
To make things even easier, here’s a printable checklist of painting supplies for home and art projects (no signup, just copy and use):
- High quality brush set (angled and flat)
- Roller kit (with a pole and a few different naps)
- Painters tape (FrogTape or equivalent)
- Drop cloth (canvas or thick plastic)
- Paint tray and tray liners
- Paint stir stick and pour spout
- Putty knife, caulk gun, spackling paste
- Sandpaper or sanding block
- Extension pole for rollers
- Cleaning rags and brush comb
- Disposable gloves and mask (for harsh paints or spraying)
- Art: Detail brush set, mixing palette, palette knives, canvas/paper, water/solvent jars
Final Thoughts
Getting the paint job you pictured depends so much on having the right tools for your project. Every tool I’ve recommended is based on personal hands on use, honest feedback from pros and artists, and learning after a lot of trial and error. Skipping the tools that help you prep, paint more efficiently, and clean up with less hassle almost always leads to a longer, messier, or less satisfying job.
If you invest in a few reliable brushes, roller kits, and prep tools, you’ll be set for almost any painting project that comes your way. Wall, art, or furniture. With each project, you’ll learn which tools you reach for first and which make the work way more enjoyable (or simply look better when you’re done).
You’re always welcome to ask questions about paint tools, brands, or where to buy good supplies at a fair price. Reach out in the comments or by email and I’ll be happy to point you in the right direction. Happy painting, and may your next project turn out just the way you want!